The control panel design is a pretty complicated process. Perhaps if you’ve built a bunch of arcade cabinets before you can get a good sense of what works and doesn’t, but lacking that its just a bunch of guessing. Visio definitely helps, as you can print out and tape together full sized mockups to get a sense of what would fit where. Having done that with the designs in my last post on it, its clear I just simply can’t do what I want to do with either of the cocktail cabinets I’ve found to buy.
There’s really not enough room on the long end for a reasonable set of controls for two players and a trackball. The trackball units are too big to really fit. I’ve seen some cobbled together that are either super cramped, or are entirely custom (and much larger) cocktail tables. There’s also no way to make anything fit on the end of the table, even with a fairly generous 12×8 control surface. Without being able to bigger, there really isn’t a way to do what I want to do.
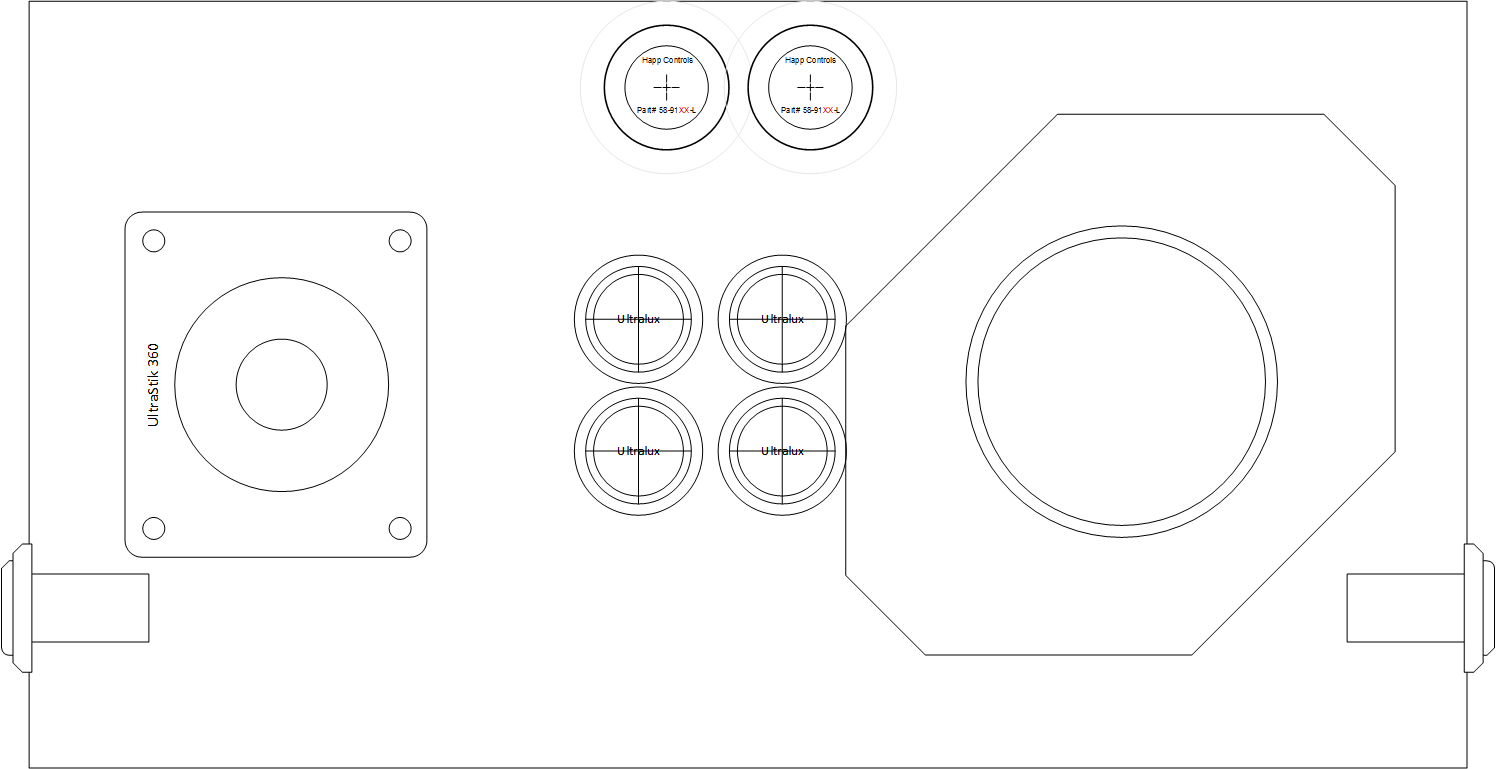
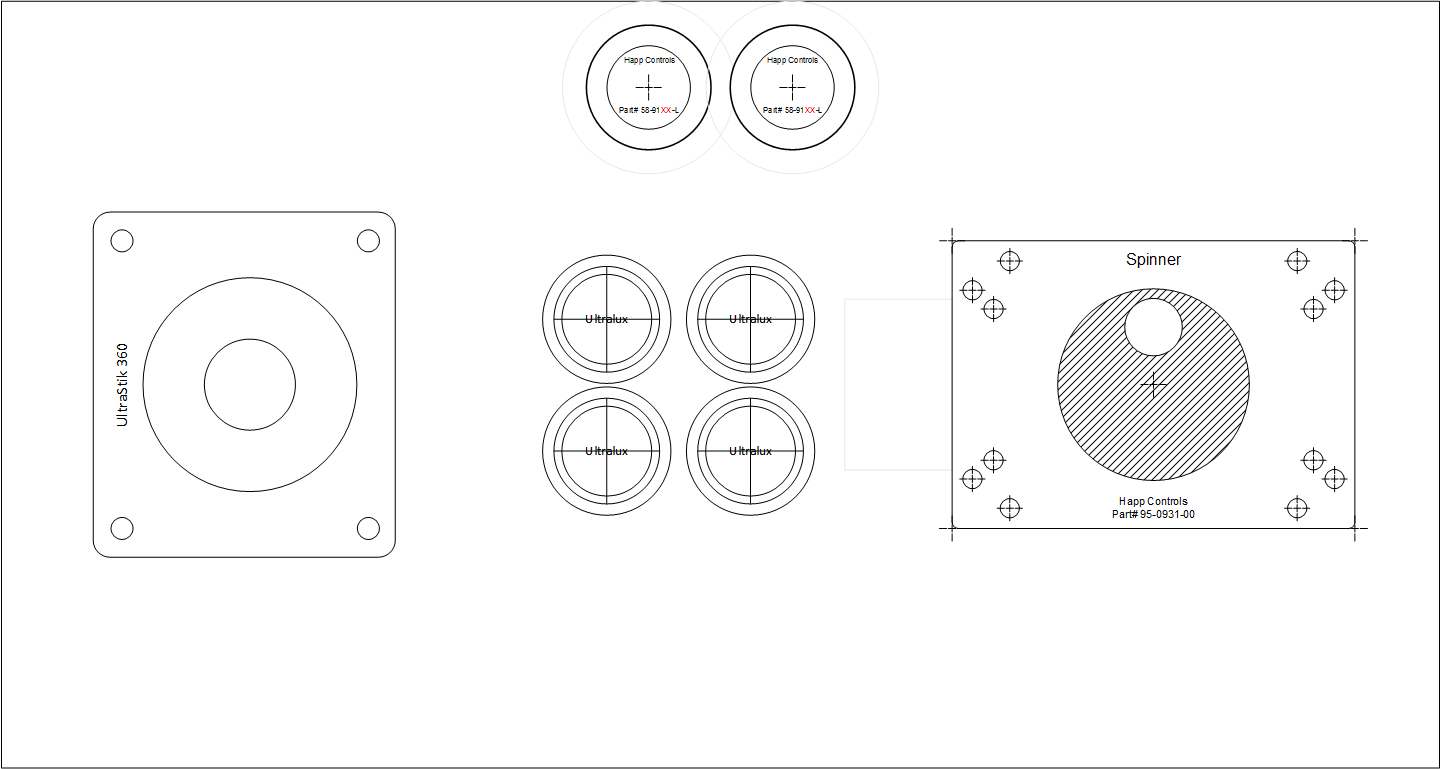
Having started setting up the emulator software, I think its clear I actually need more buttons, not less. I need four control buttons, minimum, and to play a bunch of the classic console emulators, I need eight buttons, not six, for player 1 and player 2. I also, the more I’ve thought about it, think I really want to have a setup with a trackball on one end, and a spinner on the other. Putting either on the two-player panel just doesn’t seem workable.
In lamenting this problem, I asked in a post on Reddit’s /r/cade forum, for any other suggestions for cocktail cabinet makers. It turns out I got a near universal set of recommendations, for a company called Haruman Customs. Their website lists a lot of example bar-top arcade cabinets, but it turns out he’s made a few cocktail ones, has been working on a 4-player design, and also does custom CNC work. He messaged me, as well. It took a good bit of time to actually engage in a project with him because of vacations and stuff, but since determined that his company was a perfect setup for me to get custom-built what I wanted. By making the control panels bigger — 22×7 for the long panel, and 15×7 for the end panels, there’s plenty of room for everything I want to do.
The first pass of designs showed I could definitely make things fit. At that point I was still thinking six buttons, not eight, but the important thing is that the end panels fit. These were originally 22×8 and 15×8. I shrunk the long panel to 22×7, but still have the end panels at 15″x8″.
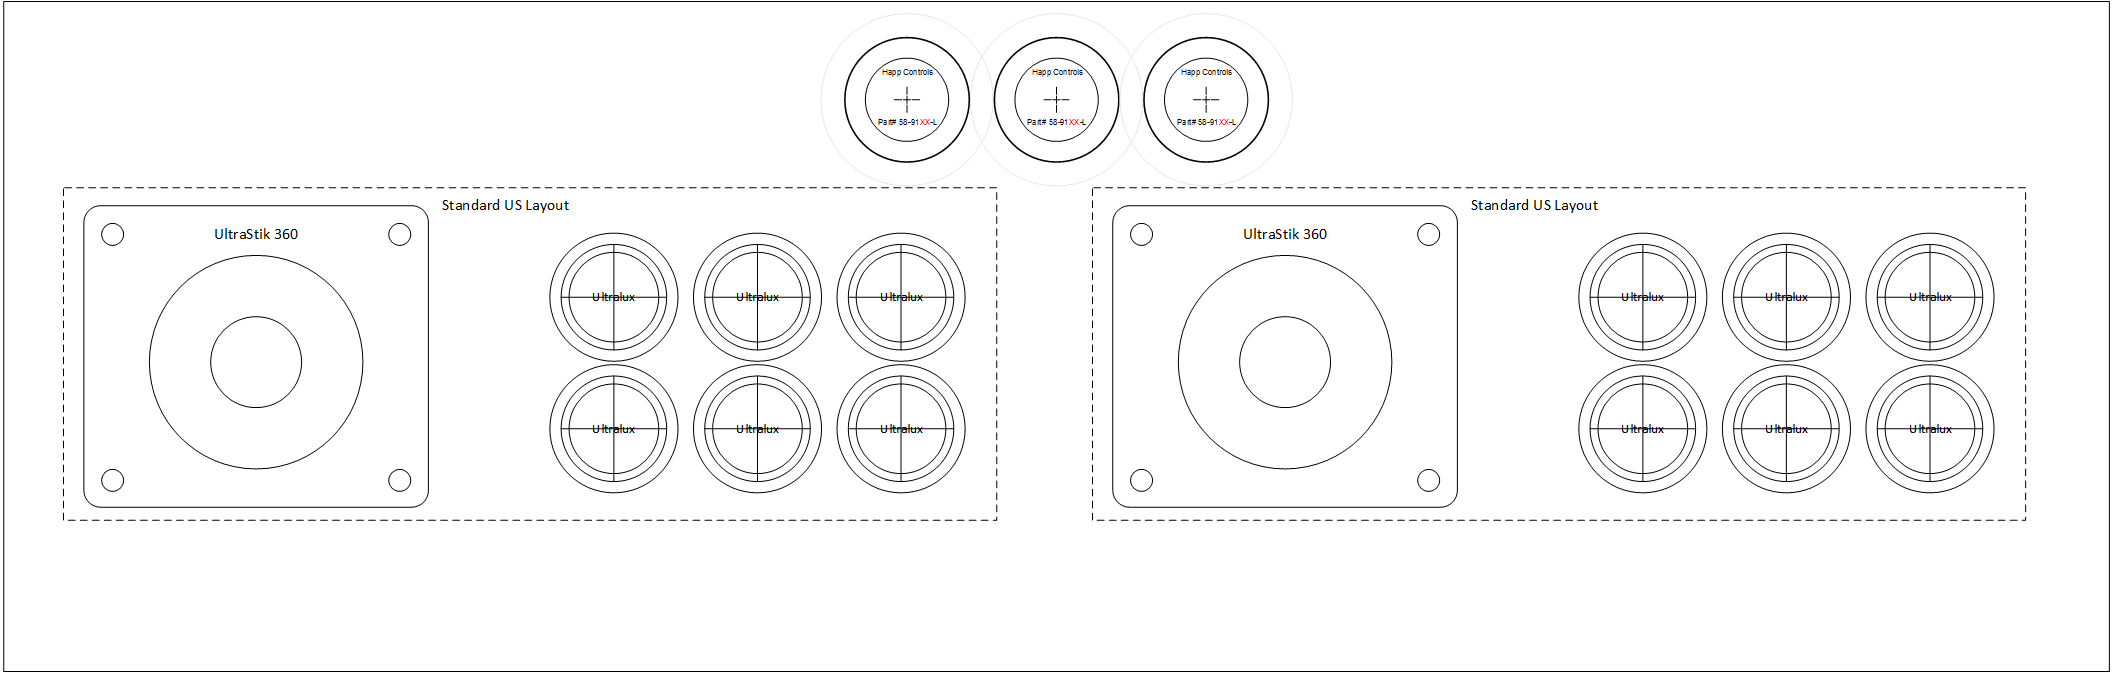
These seemed very workable. I printed out copies of them, and did some crafting, so I could sit in front of them and feel how they were laid out.
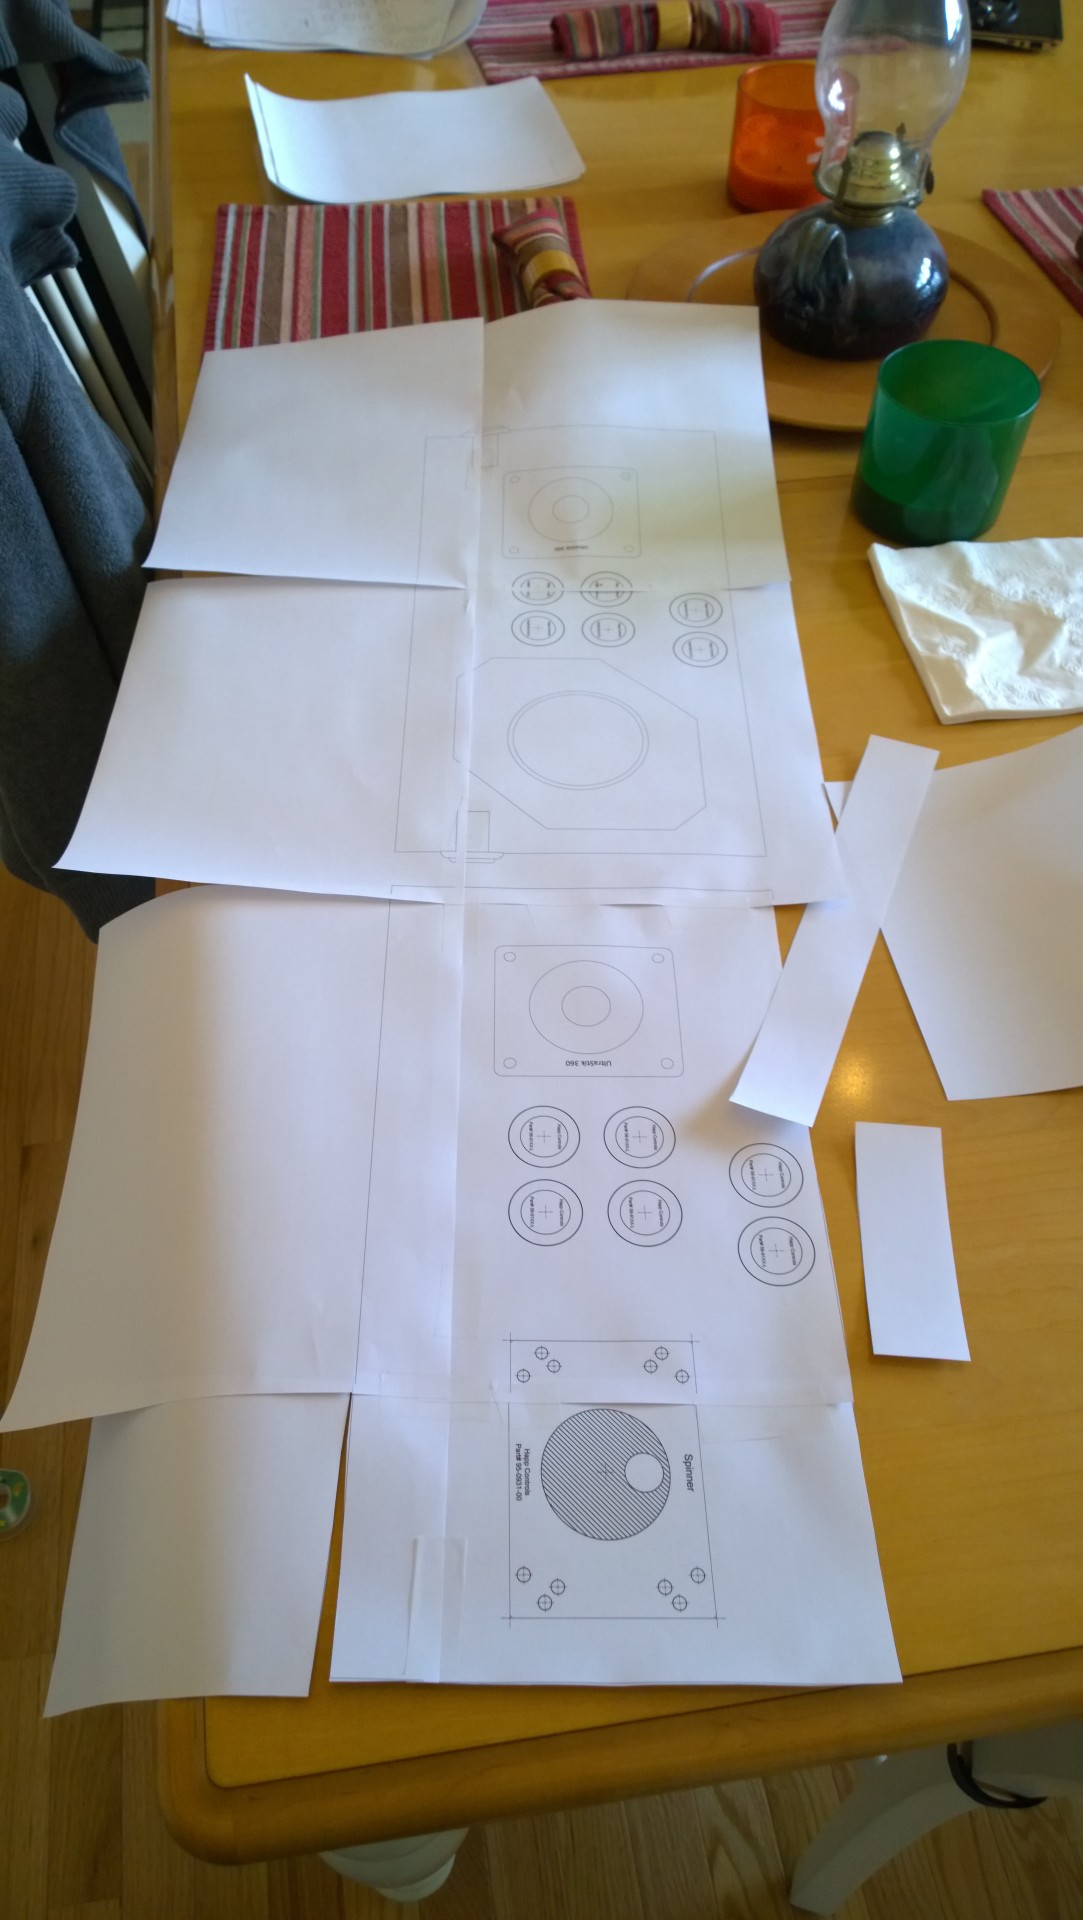
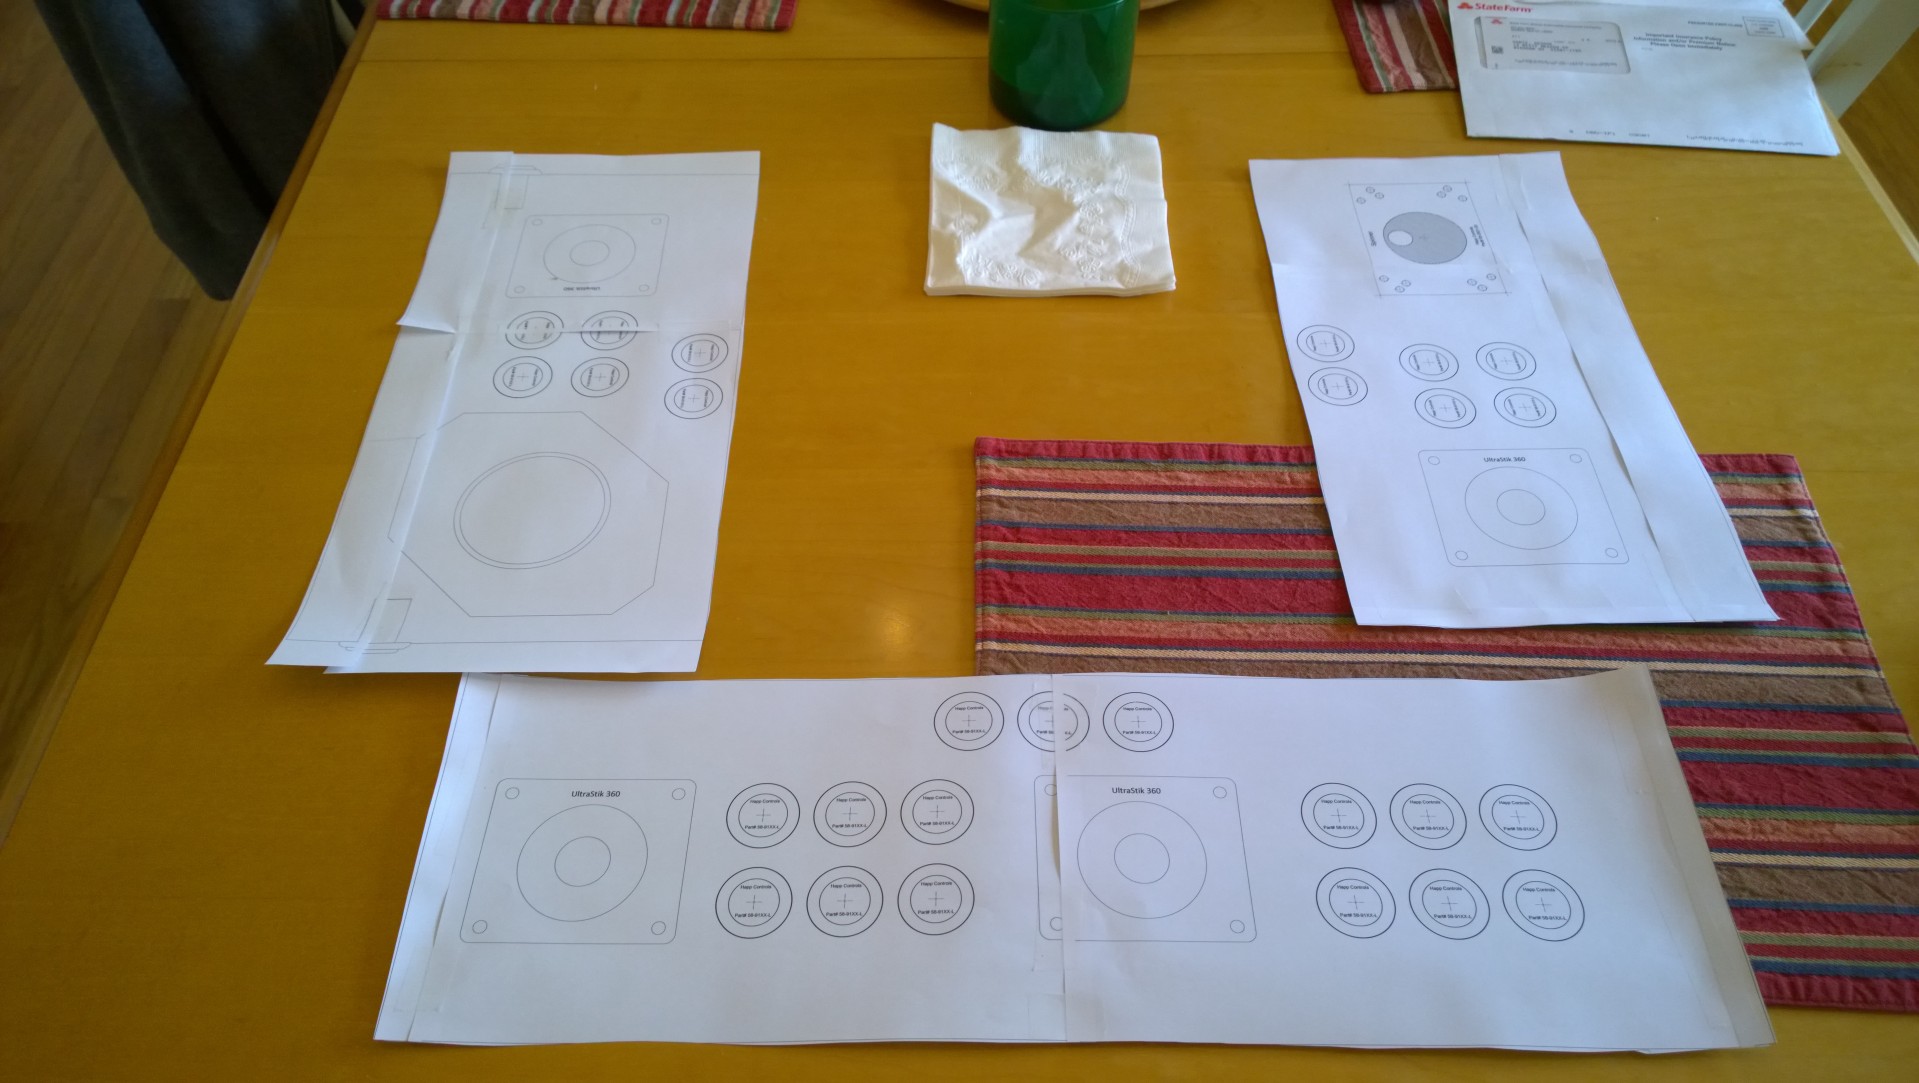
These actually worked very nicely. The only problems I found were three things:
- I didn’t like the grid layout of the buttons, sitting close to the panel made it uncomfortable. Of note, sit-down Japanese “candy cabinet” style games don’t use that kind of layout.
- I really needed eight buttons per player on the long panel
- The 8″ deep end panels were going to be too big
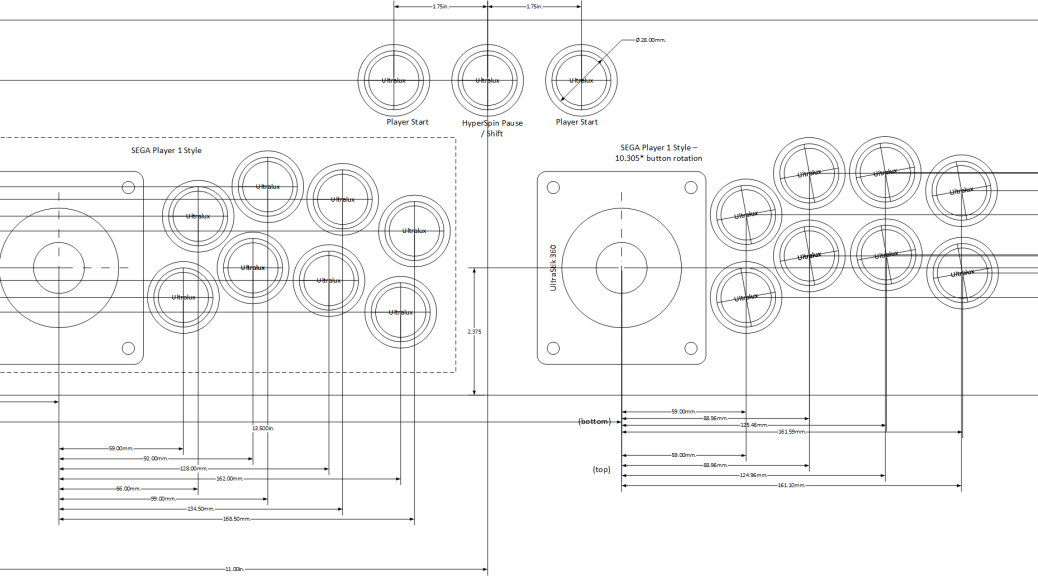
After some more futzing around, and another round of printouts, I had a design I liked. I redid them from scratch in Visio, so I could ensure they were positioned to the thousandth of an inch how I wanted them. These would be used to create the CNC files for the final panels. I based the button layout on a SEGA design used in common sit-down cabinets in Japan, and found it far more comfortable. I modified the right-hand controls slightly to put the buttons at a -10 degree angle so it’d be more comfortable to sit side-by-side.
The diagrams are smaller because of the measurements, click to view them full-size.

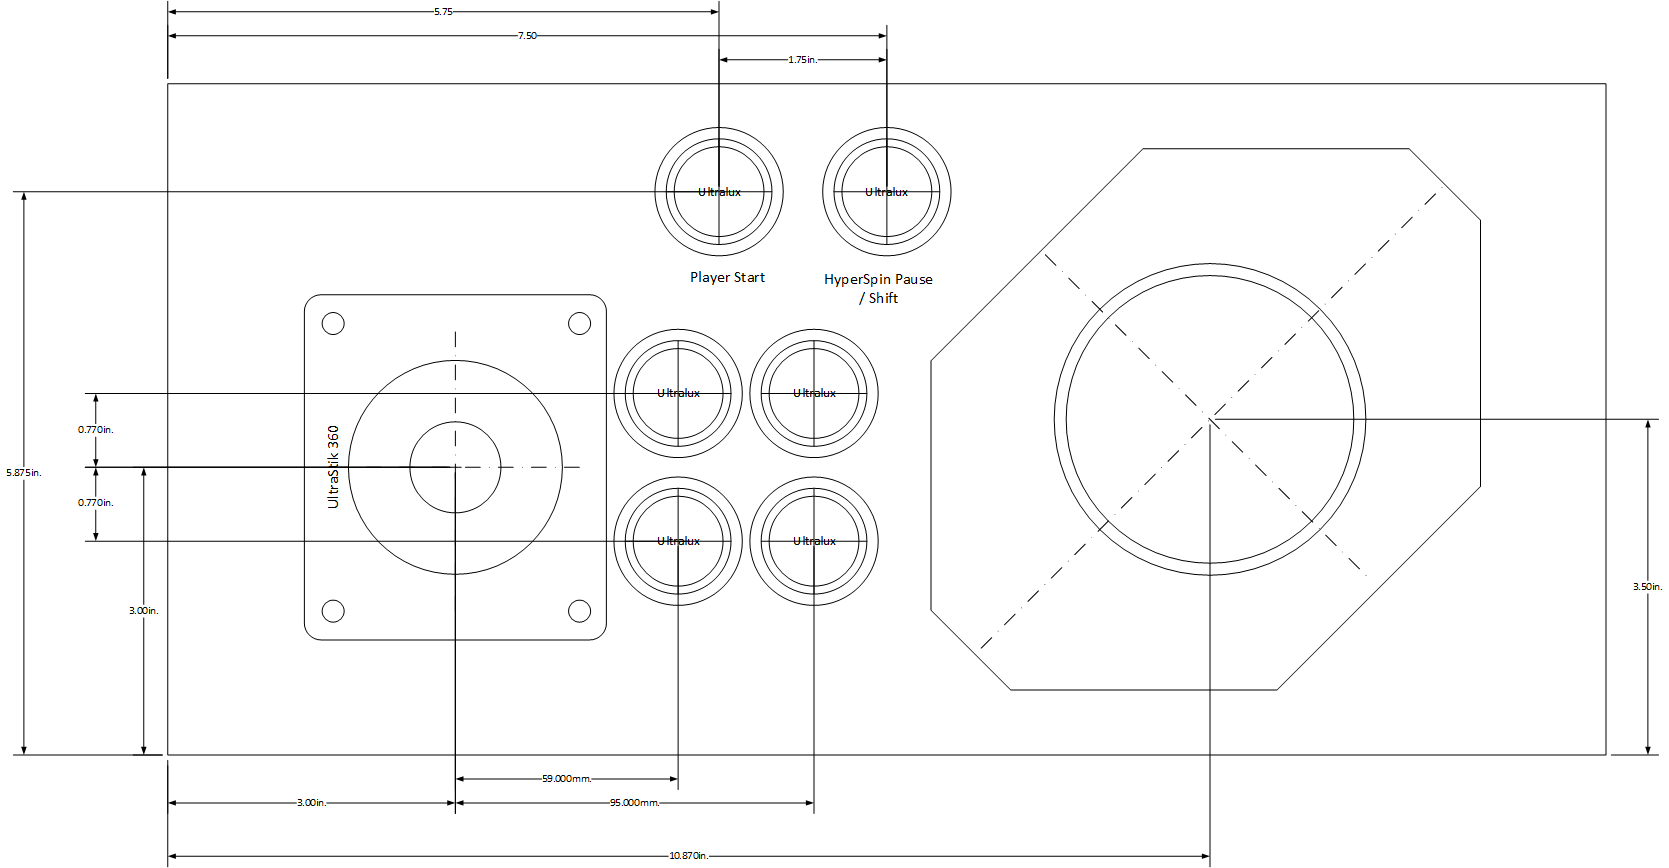
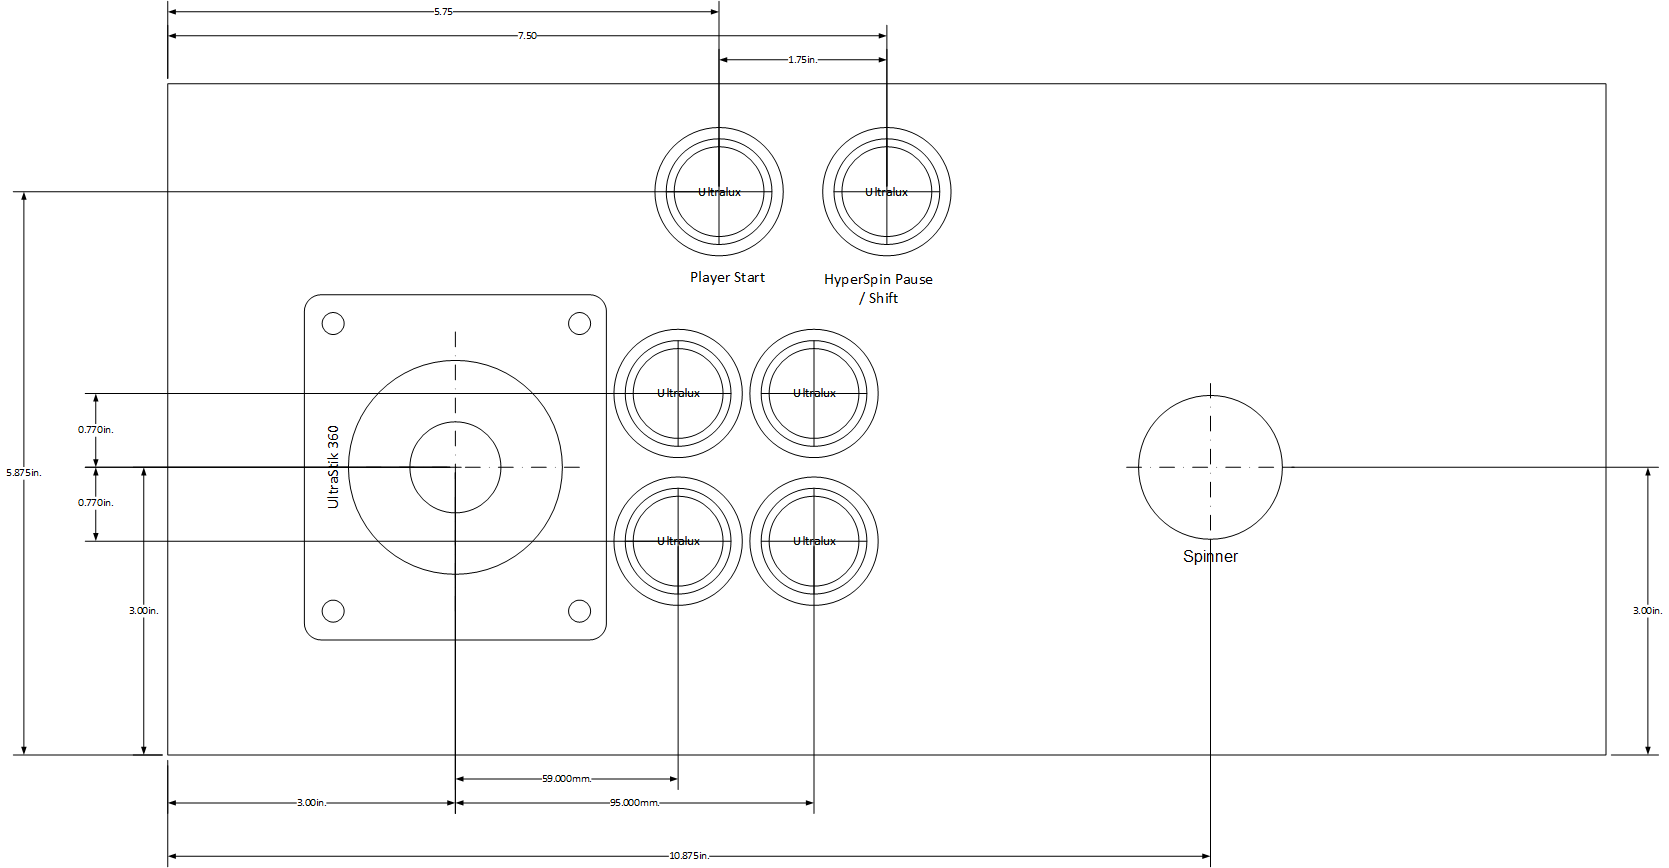
These are the final intended layouts. The only change is to the end panels to push the controls up a quarter inch, because I decided to go with 3/4″ MDF instead of 1/2″ plywood for the control panels themselves. The “front” of the control panels sits under these, so the trackball was in the way slightly.